GUIDE: Run the jailbreak with PwnageTool iOS 4.3 beta 1 [MAC]
Premises
- This is a procedure for expert users is dedicated to developers only.
- The jailbreak will be done type of semi-tethered , that just as with Redsn0w 0.9.6.
- Users must manually create a RAM disk to restore the custom firmware created.
- The current version of Cydia is perfectly compatible with IOS 4.3.
- The baseband of the iPhone 4 Foreigners will NOT be updated by running this kind of jailbreak.
- To use the Cydia applications in a timely manner and to restart the iPhone will need to use a utility called tetheredboot .
- Unless you have restarted in tether mode you can not use Cydia and MobileSubstrate with its extensions.
fouzanspykid assumes no liability whatsoever arising from the use of the information contained in this guide. We do not recommend all users to follow the above to avoid problems of all kinds. This is a guide with very complex and delicate procedures. Proceed at your own risk.Necessary
- Bundle + PwnageTool Cydia ( download ).
- Firmware 4.3 beta 1 saved on your desktop ( download - just developers).
- Mac OS X.
- iTunes 10 or later ( download ).
- PwnageTool 4.1.2 ( download ).
Help
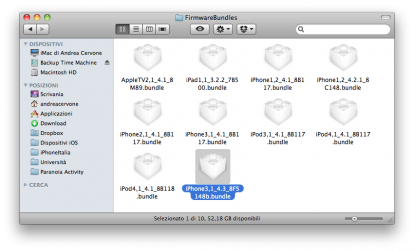
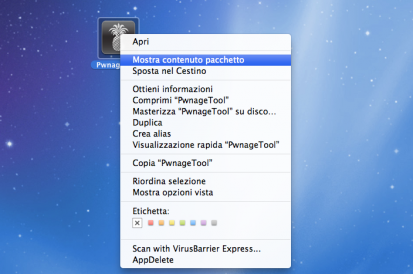
1. Download PwnageTool and move the application on the desktop.2. Right-click the program icon and then on "Show package contents".3. Stand then in the path C ontents / Resources / FirmwareBundles.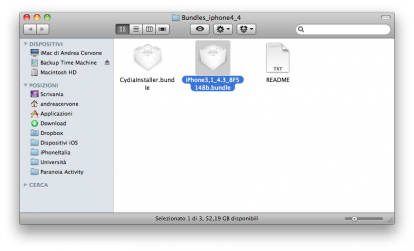 4. Now you should copy the file iPhone3, 1_4.3_8F5148b.bundle , you'll find inside the folder Bundles_iphone4_4 discharged earlier, in C ontents / Resources / FirmwareBundles , the location where you have previously placed. In this way, PwnageTool will recognize the firmware 4.3.
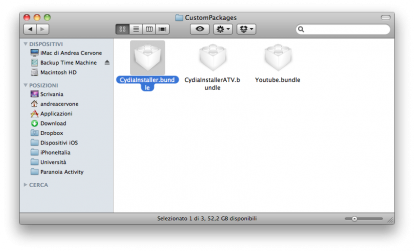
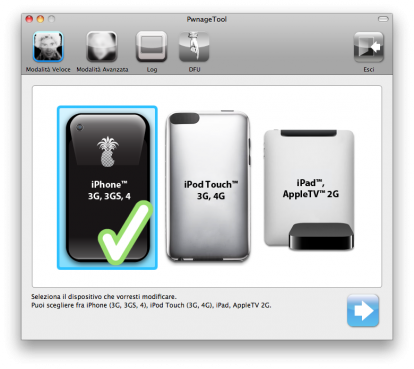
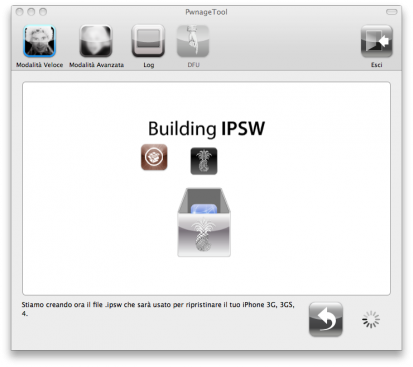
 5. Now, however, you must insert the file CydiaInstaller.bundle , available in the archive Bundles_iphone4_4 within Pwnagee Tool. Just click again on the right button, then click "Show package contents" and once in the path Contents / Resources / CustomPackages , paste the file in question (overwriting it, if one already exists).6. Close the Finder window and open PwnageTool. Select the "iPhone 3G/3GS/4" to proceed with the creation of custom firmware 4.3 beta 1 for your iPhone 4. Recall that this procedure is only compatible with this device.7. Click on "Advanced Mode" and select manually, if not recognized automatically, the. Ipsw IOS 4.3 Beta 1 (which you have previously downloaded dall'iOS Dev Center). Confirm the operation and wait until the last PwnageTool the creation of custom firmware. At one point PwnageTool will ask you to enter your user password. Do so and the creation of custom firmware will be completed in seconds.8. Creating the RamdiskTools needed: bspatch, xpwntool, ldid
- Download this archive.
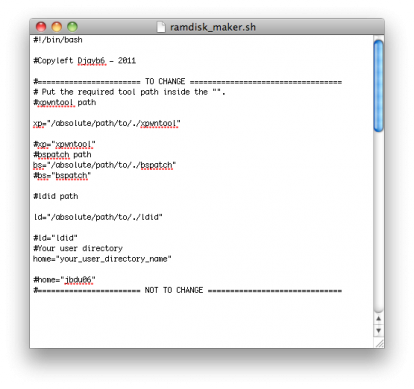
- Open the file ramdisk.sh with a text editor (TextEdit) and edit the directory that contains the downloaded packages and your name. (Eg ="/../.." xp in xp = "/ Users/VostroNomeUtente/dir1/./xpwntool /" )
- Open Terminal, type "su root" and then your password. Press Enter and then type "/ path / to /. / ramdisk_maker.sh" . Follow the instructions on the screen.
9. Now you have to set your device in DFU, you will need to do:- Press and hold the Power and Home button for 10 seconds.
- Release the Power button and keep pressing Home for another 10 seconds.
- Your device will now be in DFU mode.
10. Open iTunes and click the tab for your iPhone, located on the right hand side bar. Press and hold Alt and click on "Restore" (not "Refresh" or "Check for Update").A new window from which you must select the custom firmware 4.3 beta 1 previously created. Once done, click "Open" to confirm.11. Now the rest of the process will be automatic. iTunes will restore the custom firmware on your iPhone, you will not have to do is wait. You will see a progress bar on the screen of the iPhone that will indicate the status of the procedure. After the procedure you will have a jailbroken iPhone 4 with IOS 4.3 beta 1 installed correctly.Restarting in tethered mode
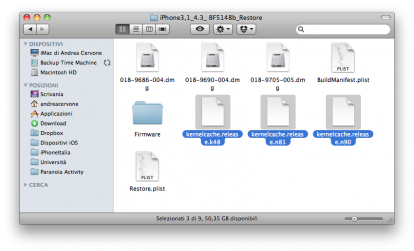
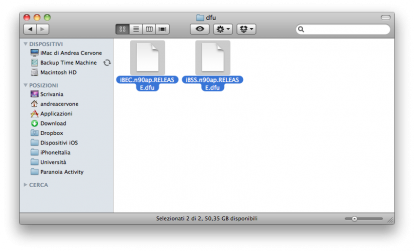
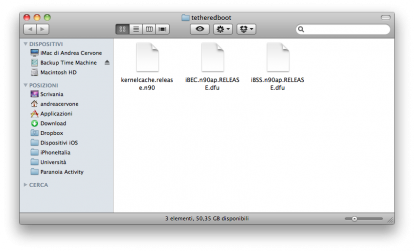
1. Create a copy of the 4.3 custom firmware created and change the file extension from . ipsw to . zip , unzip and then open the file. Inside the folder you just extracted the file you will need kernel. Attention, the K48 is reported iPad, the N81 is the fourth-generation iPod Touch.Similarly saved files IBSS / IBEC for your device by retrieving the folder / Firmware / dfu / directory .2. Download tetheredboot from this link and create a folder on your desktop called "tetheredboot. Inside the three included files (kernel, IBSS and IBEC) previously selected after unzipping the file. Ipsw.3. Restart your iPhone which will come into Recovery Mode. Open Terminal on the Mac and type the following commands:sudo sh
You will be prompted for a password from an administrator. Insert it, confirm and type the following commands:cd ~ / Desktop / tetheredboot. / Kernel tetheredboot IBSS
It will run the code in the Terminal window, after a while you will be prompted to set the iPhone into DFU mode. To do this simply, as before, press and hold Home and Power button for 10 seconds, then release the Power button and keep pressing Home for another 10 seconds. Once the iPhone will be entered into DFU mode, tetherboot will automatically direct upload of the kernel and IBSS file on your terminal, followed by the kernel patch.The process will conclude when the "Exiting libpois0n" in Terminal. The iPhone will display a white screen for a few seconds, if you have correctly followed the instructions of the guide, after a few seconds you can view the screen classic "Slide to unlock" and you have completed the restart in tethered mode.
Premises
- This is a procedure for expert users is dedicated to developers only.
- The jailbreak will be done type of semi-tethered , that just as with Redsn0w 0.9.6.
- Users must manually create a RAM disk to restore the custom firmware created.
- The current version of Cydia is perfectly compatible with IOS 4.3.
- The baseband of the iPhone 4 Foreigners will NOT be updated by running this kind of jailbreak.
- To use the Cydia applications in a timely manner and to restart the iPhone will need to use a utility called tetheredboot .
- Unless you have restarted in tether mode you can not use Cydia and MobileSubstrate with its extensions.
fouzanspykid assumes no liability whatsoever arising from the use of the information contained in this guide. We do not recommend all users to follow the above to avoid problems of all kinds. This is a guide with very complex and delicate procedures. Proceed at your own risk.Necessary
- Bundle + PwnageTool Cydia ( download ).
- Firmware 4.3 beta 1 saved on your desktop ( download - just developers).
- Mac OS X.
- iTunes 10 or later ( download ).
- PwnageTool 4.1.2 ( download ).
Help
1. Download PwnageTool and move the application on the desktop.2. Right-click the program icon and then on "Show package contents".3. Stand then in the path C ontents / Resources / FirmwareBundles. 4. Now you should copy the file iPhone3, 1_4.3_8F5148b.bundle , you'll find inside the folder Bundles_iphone4_4 discharged earlier, in C ontents / Resources / FirmwareBundles , the location where you have previously placed. In this way, PwnageTool will recognize the firmware 4.3.
 5. Now, however, you must insert the file CydiaInstaller.bundle , available in the archive Bundles_iphone4_4 within Pwnagee Tool. Just click again on the right button, then click "Show package contents" and once in the path Contents / Resources / CustomPackages , paste the file in question (overwriting it, if one already exists).6. Close the Finder window and open PwnageTool. Select the "iPhone 3G/3GS/4" to proceed with the creation of custom firmware 4.3 beta 1 for your iPhone 4. Recall that this procedure is only compatible with this device.7. Click on "Advanced Mode" and select manually, if not recognized automatically, the. Ipsw IOS 4.3 Beta 1 (which you have previously downloaded dall'iOS Dev Center). Confirm the operation and wait until the last PwnageTool the creation of custom firmware. At one point PwnageTool will ask you to enter your user password. Do so and the creation of custom firmware will be completed in seconds.8. Creating the RamdiskTools needed: bspatch, xpwntool, ldid
- Download this archive.
- Open the file ramdisk.sh with a text editor (TextEdit) and edit the directory that contains the downloaded packages and your name. (Eg ="/../.." xp in xp = "/ Users/VostroNomeUtente/dir1/./xpwntool /" )
- Open Terminal, type "su root" and then your password. Press Enter and then type "/ path / to /. / ramdisk_maker.sh" . Follow the instructions on the screen.
9. Now you have to set your device in DFU, you will need to do:- Press and hold the Power and Home button for 10 seconds.
- Release the Power button and keep pressing Home for another 10 seconds.
- Your device will now be in DFU mode.
10. Open iTunes and click the tab for your iPhone, located on the right hand side bar. Press and hold Alt and click on "Restore" (not "Refresh" or "Check for Update").A new window from which you must select the custom firmware 4.3 beta 1 previously created. Once done, click "Open" to confirm.11. Now the rest of the process will be automatic. iTunes will restore the custom firmware on your iPhone, you will not have to do is wait. You will see a progress bar on the screen of the iPhone that will indicate the status of the procedure. After the procedure you will have a jailbroken iPhone 4 with IOS 4.3 beta 1 installed correctly.Restarting in tethered mode
1. Create a copy of the 4.3 custom firmware created and change the file extension from . ipsw to . zip , unzip and then open the file. Inside the folder you just extracted the file you will need kernel. Attention, the K48 is reported iPad, the N81 is the fourth-generation iPod Touch.Similarly saved files IBSS / IBEC for your device by retrieving the folder / Firmware / dfu / directory .2. Download tetheredboot from this link and create a folder on your desktop called "tetheredboot. Inside the three included files (kernel, IBSS and IBEC) previously selected after unzipping the file. Ipsw.3. Restart your iPhone which will come into Recovery Mode. Open Terminal on the Mac and type the following commands:sudo sh
You will be prompted for a password from an administrator. Insert it, confirm and type the following commands:cd ~ / Desktop / tetheredboot. / Kernel tetheredboot IBSS
It will run the code in the Terminal window, after a while you will be prompted to set the iPhone into DFU mode. To do this simply, as before, press and hold Home and Power button for 10 seconds, then release the Power button and keep pressing Home for another 10 seconds. Once the iPhone will be entered into DFU mode, tetherboot will automatically direct upload of the kernel and IBSS file on your terminal, followed by the kernel patch.The process will conclude when the "Exiting libpois0n" in Terminal. The iPhone will display a white screen for a few seconds, if you have correctly followed the instructions of the guide, after a few seconds you can view the screen classic "Slide to unlock" and you have completed the restart in tethered mode.


sudo sh
cd ~ / Desktop / tetheredboot
. / Kernel tetheredboot IBSS
Tags: Apple, Jailbreak
Subscribe to:
Post Comments (Atom)


 Previous Article
Share your views...
0 Respones to "GUIDE: Run the jailbreak with PwnageTool iOS 4.3 beta 1 [MAC]"
Post a Comment